The Muppet Show used to be one of my favorites when I was very young. I have always liked their crazy characters and would fancy to create it one day myself.
Tutorials and blogs: good preparation for your first puppet
Recently I stumbled on the very good tutorials by Adam Kreutinger. He is an very experienced puppet maker next to his work as a costume maker. His videos are fun to watch, he is very passionate about puppets and shows how to create them in quite an amount of detail. There is tons of hours of material to watch.
Why creating eyes yourself?
If you want to create your own puppet you can buy all sorts of eyes but I think it is more fun to also create your own set of eyes. It also enables you to completely design it to your own taste. If you do this more often it is also cheaper to do it yourself.
Using a mold and resin
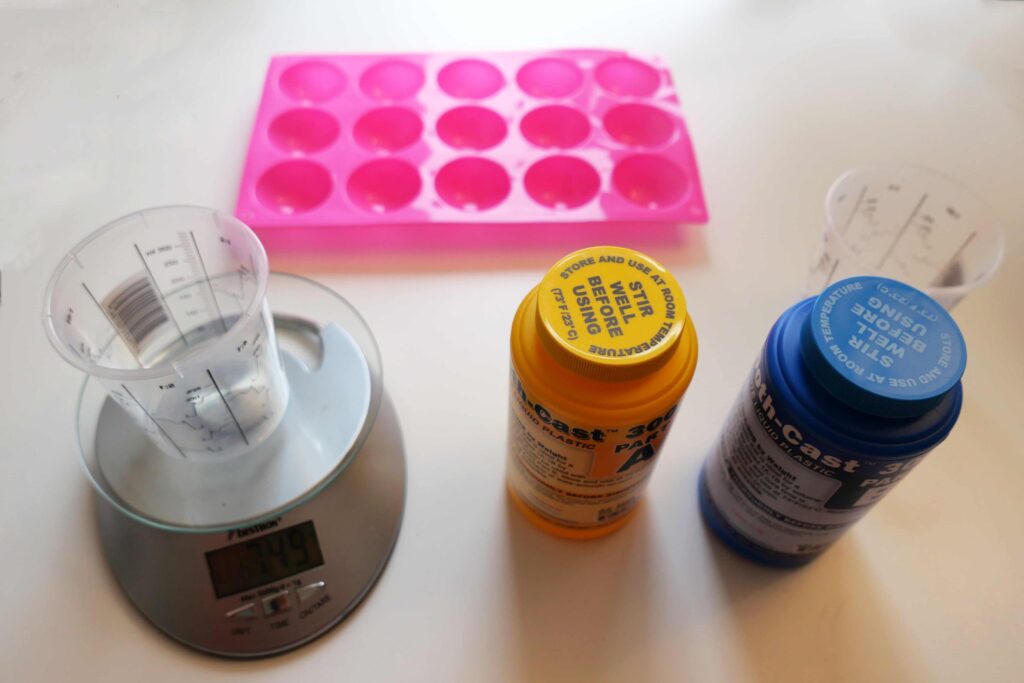
Today I had my first experience in using Resin and it was partly based on the tutorial by Adam Kreutinger, however, I bought half balls silicone baking shapes as a start. You can create a mold yourself from silicones but I wanted to skip that part. When I received these shapes by mail I already thought that these may be made of a bit too flimsy material.
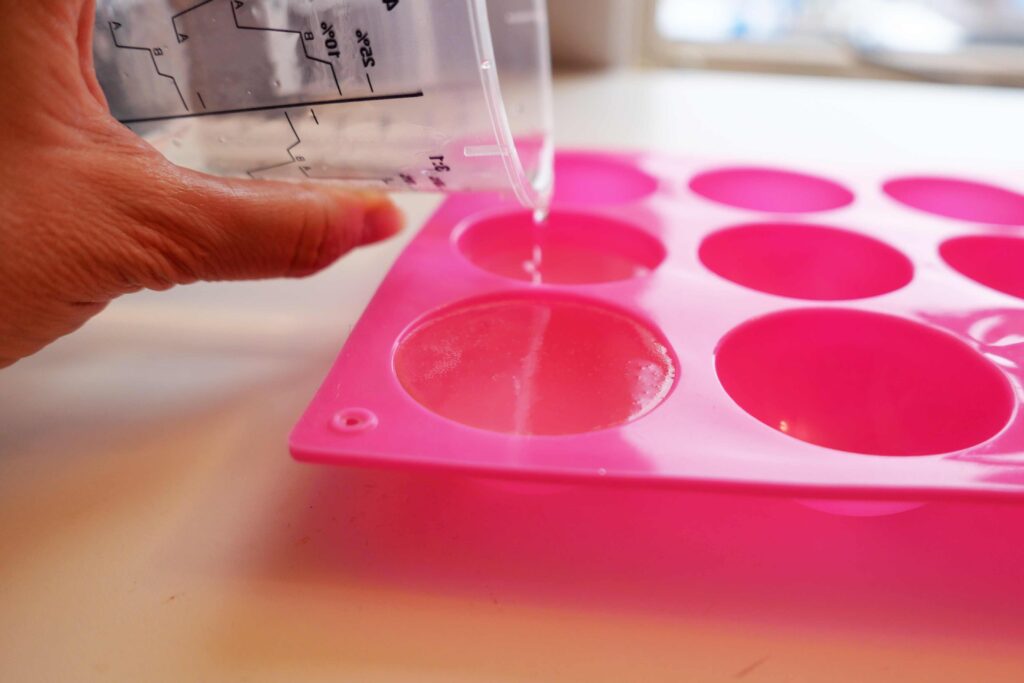
The resin itself is easy to work with. You can either mix by same volumes of part a and b or weigh them in ration of A:B=10:9. Having a pharmacy background, I knew the weighing would be more accurate so I chose for that option. After stirring the 2 components very well together for a couple of minutes, you can fill your form and it hardens in ±10 minutes already and the material feels quite sturdy when hardened. On the package it warns you to not breathe it in or have it touch your skin but I felt it was odorless. Anyway, it is better to use it in a well ventilated space while wearing cloves.
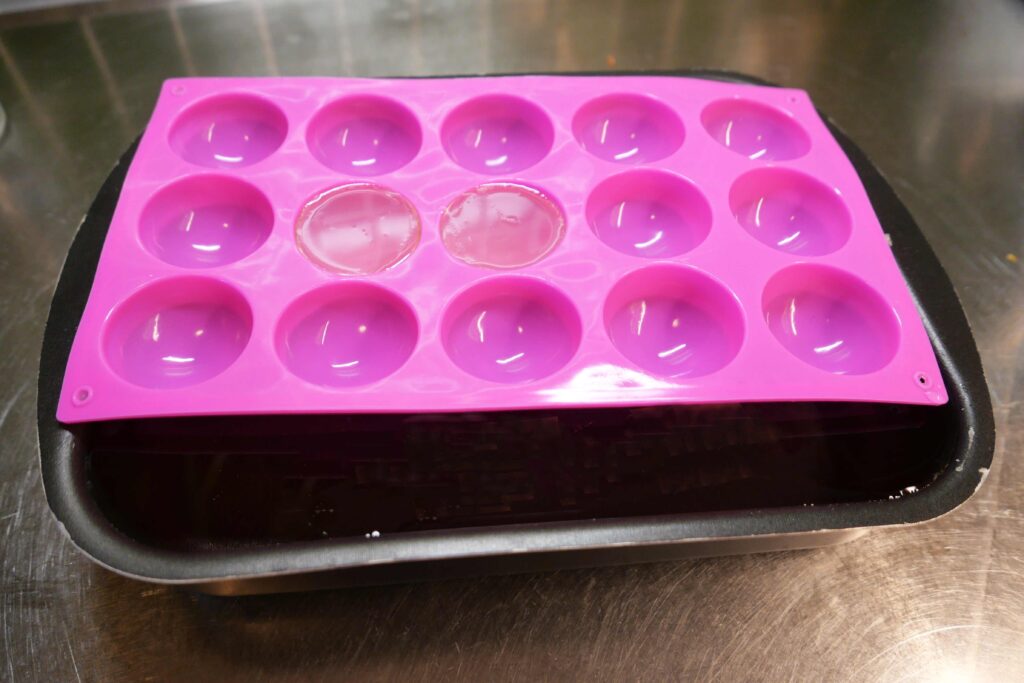
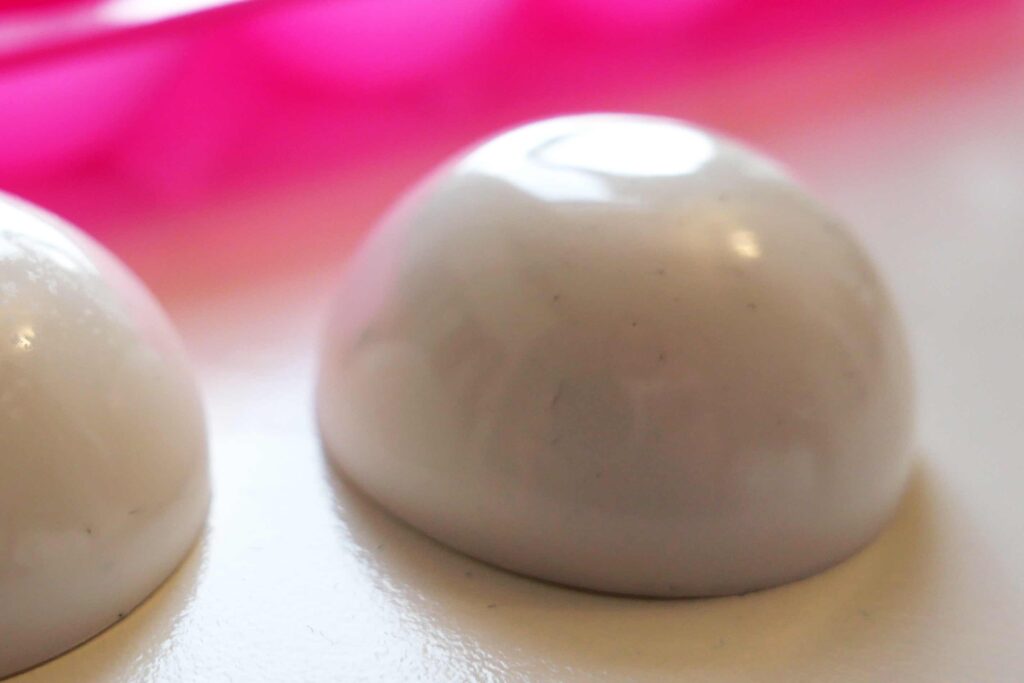
My first attempt turned out quite bad… the baking forms were indeed too flimsy and due to the weight of the resin its shape changed and it turned out as balls with a flat top…. not so great. Luckily my boyfriend was closeby and he likes to come with Mac Gyver solutions: use of a bowl of water where the baking shape could float on. This would avoid the flimsy material to change its shape when filling it with resin. This worked much better! I think the balls are still not perfectly round but quite close to it. When further finishing touches are added, e.g. the eyelids, you will not notice the remaining irregularity anymore.

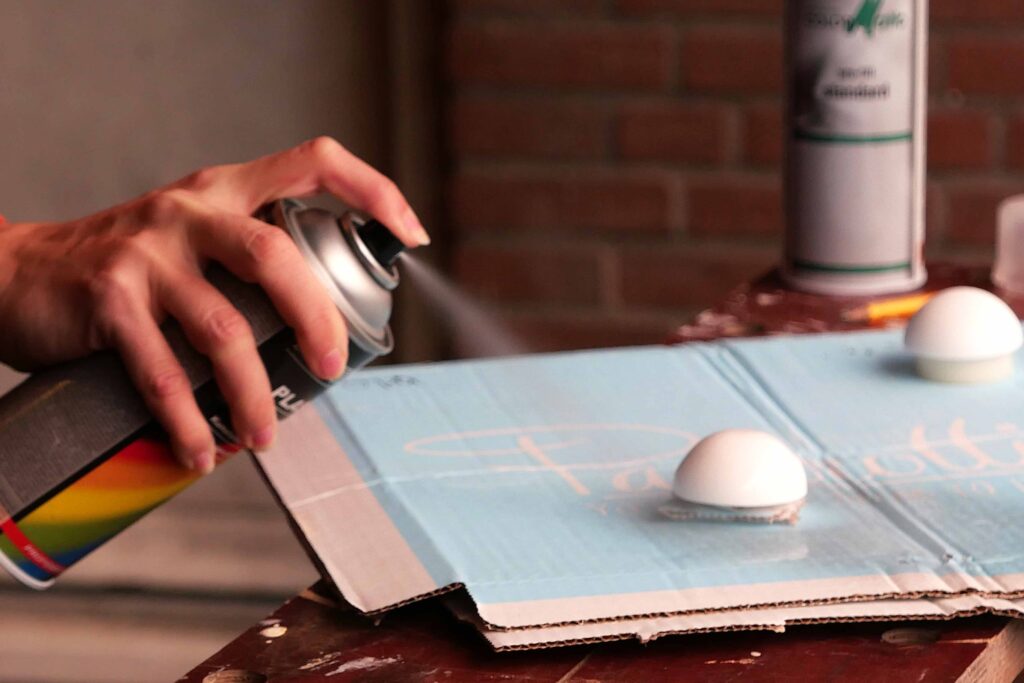
Sanding & Painting
After hardening, sand them with sanding paper 120 or finer. Spray paint them with the desired colour. Without paint these may look already well but it protects them from possible discoloration. Use a little block or something similar under the eyeball so that you can also reach the bottom edge with the paint.

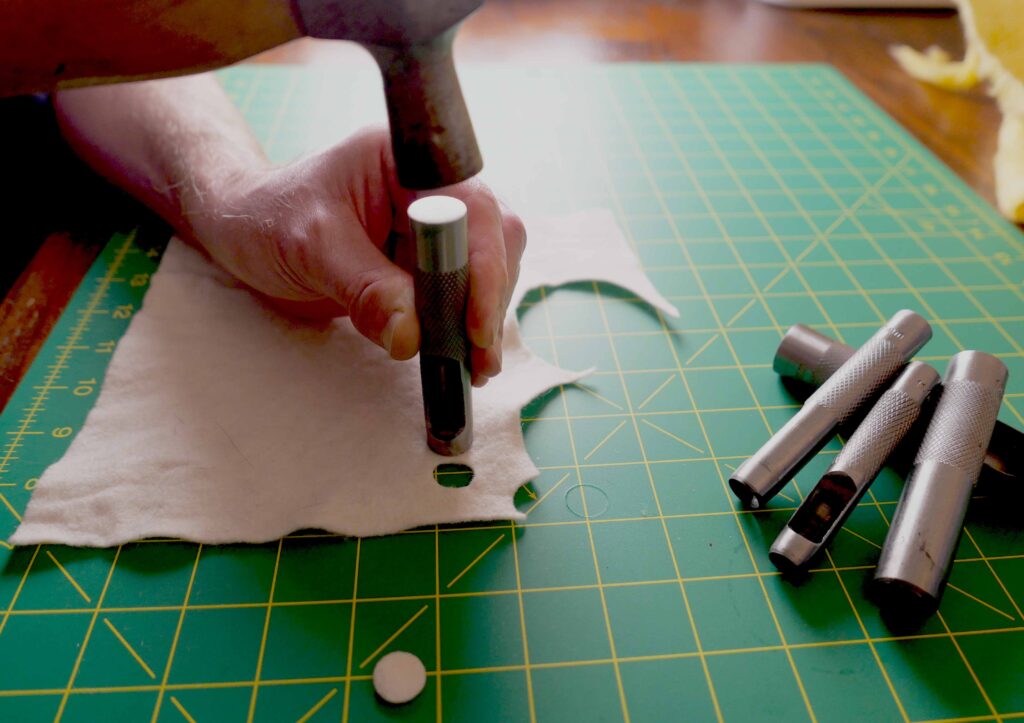
Pupils
There are several options for creating pupils. I used felt for my puppet. With scissors, the pupils probably won’t become perfect circles. I used punching tools with a hammer instead and it worked very well. You can also try punching pliers, but the circles are usually a bit smaller. My punching set came in 15 sizes, from 2 mm to 22 mm diameter so there is a good choice for how big the pupils can be made.
Other puppet makers sometimes use black plastic safety eyes where they saw away the protrusion on the back.
I am curious about your experience with creating puppet eyes? Please share by commenting to this post!
My lessons learned when using resin:
- use forms that are a bit sturdy (consider creating your own silicone form)
- ensure your mixing cups and mold are completely free of dust before use. if not, it will be extremely well visible when the silicone has hardened. However, if you paint them it will not be a problem.
- if you are not sure how much resin you need to prepare: fill the form, with water and weigh that water. Prepare just a bit more resin to allow for a very small part of resin that does not get out of your mixing cups.
- use plastic mixing cups. When the resin hardens, you can easily pull it off from the cup.
- do not use iron spoons for stirring but use e.g. plastic instead: somehow it is much more difficult to get the resin off later. I had to use nailpolish remover and that worked but only after quite a bit of rubbing
Materials used:
- Silicone Baking Shape, half balls of 5cm (±2 inch) diameter and 2 cm height (±3/4 inch), available on Amazon
- Resin: Smooth-Cast 300, hardens within 10 minutes, white (milk white), available on Amazon
Tutorials:
Great tutorials for free from Adam Kreutinger